Landing pages, or also called landing pages, are web pages where the visitor arrives after clicking on a link (call to action or CTA).
The main use of landing pages is to turn visitors into leads.
List of landing pages.
Within the list you can create new landing pages and access those already created previously, applying a series of filters to be able to obtain only the desired set of pages.

- Creating a new landing page will create a draft page called New Landing, which should be.
- Configured and published so that it can be used as a landing.
- Listing filter to get only the desired set of pages.
- By pressing the name of an existing page you can enter the editing of it. If you belong to an experiment, a window with the detail of the associated versions will be displayed.
- Form actions:
- Edit: Access the editing of the page.
- Clone: Create a New landing based on an existing one, all configurations will be copied.
- Clear Statistics: All visit statistics associated with landing, which are usually generated in tests, are deleted at the time of being published it is recommended that the statistics be deleted.
- Delete: Delete an entire landing.
Edit landing pages.
When you first create a landing page, you must choose to use a predefined DataCrush template or if you want to upload your own HTML.
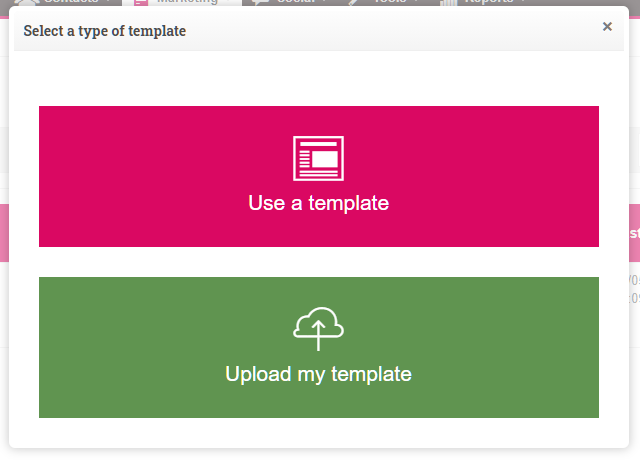
Predefined Template Selection.
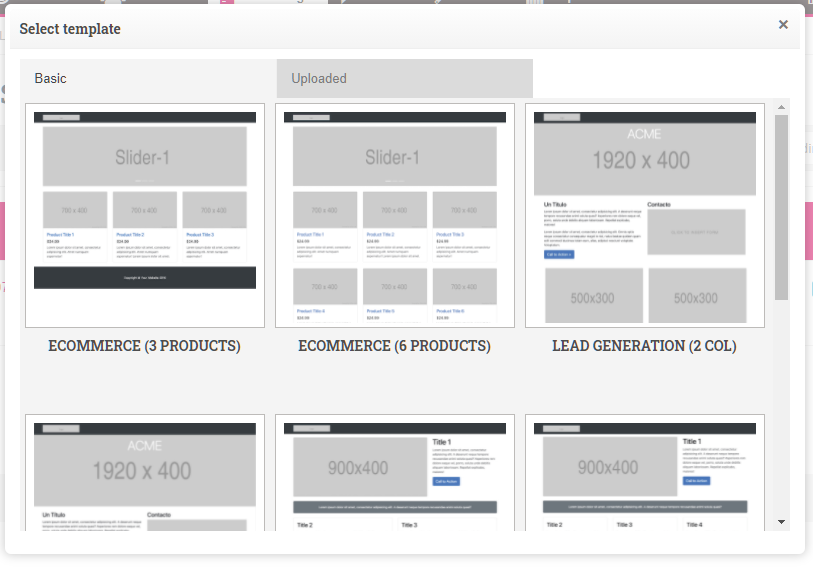
Selecting predefined templates will introduce you to a window with a preview of the templates that DataCrush offers to use in landing pages.
The HTML that we have uploaded on other occasions will also appear in this window.
Using the search engine you can filter according to the name of the template, also by positioning the mouse over a specific template you can get the name of it.
Upload your own HTML.
Your own HTML can be any web page designed outside DataCrush, either by a designer or programmer.
These types of own templates can then be assessed as predefined templates to be used in the creation of new landing pages.
After uploading your own HTML you will be assessed to the landing design screen with our HTML.
We recommend reading the User Templates section of our Learning Center to learn about the elements that allow your own HTML to use dynamic content.
The requirements that the HTML to upload must meet are:
Be a ZIP compressed file and contain:
- Index.html, A required file that must contain the HTML content.
- Images directory: A directory that contains the images used in the HTML code.
- Css directory: Style files used in HTML code.
- Js directory: JavaScript files used in HTML code (landing pages only).
- Custom directories can be created that will be used within HTML code.
- All references to external files must be made within the HTML code relatively, for example: <img src"images/background.jpg">
- The zip file must contain all these files and directories at its root, the files must NOT be located within another directory.
- If external files are referenced, another website, for example, must support HTTPS, otherwise it will not work correctly.
Deferred loading of images.
Lazy loading is a technique that defers loading non-essential resources at page load time.
These non-essential resources are loaded when they are needed. When it comes to images, non-essential is usually synonymous with off-screen.
DataCrush natively integrates with the lazysizes library for handling deferred image loading. Before you can use it, you must include the following inside your template that you uploaded to Datacrush.
- Include the /lazysizes/lazysizes.min library.js
- Use in the <img> elements of the "lazyload" class to identify that that element is used as a deferred image.
Then DataCrush when placing the selected image from the Landing Page Editor will replace the data-src attribute with the selected image, so that it is loaded lazy.
Example:
<script src"//assets2.datacrush.la/components/plugins/lazysizes/lazysizes.min.js"></script>
<img src'"mi_imagen.jpg" class"lazyload" data-type'"image" data-content"MiImagen1">
Landing page design.
On the design page you can modify each section of the landing and customize it at your convenience.
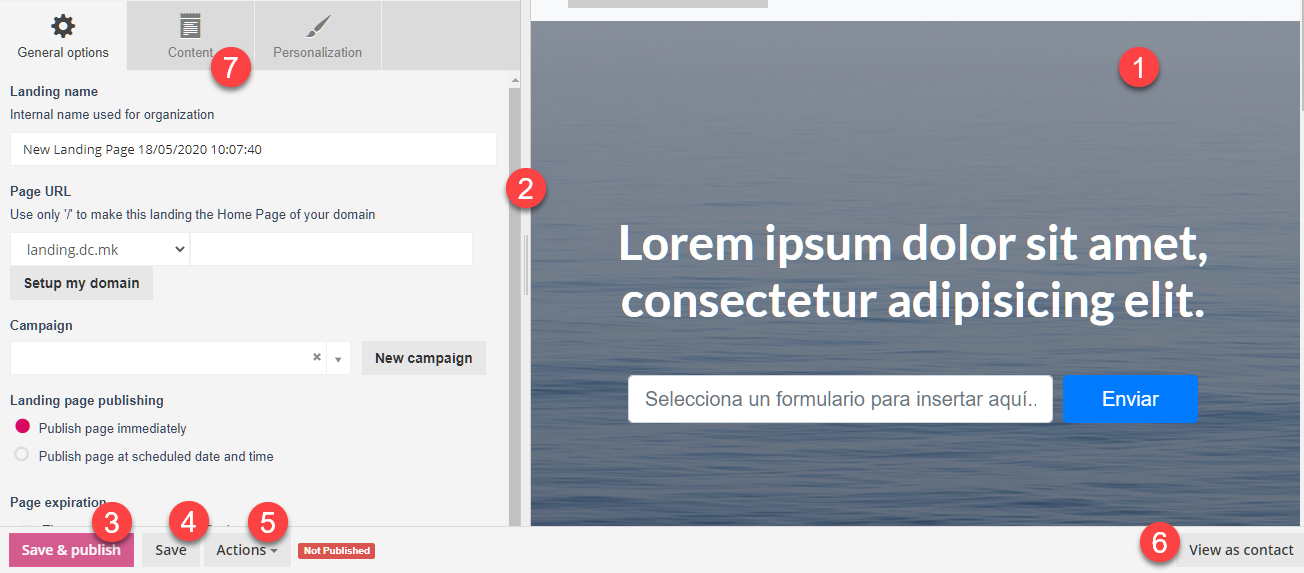
- Design area of the landing page, where you can see the edited content.
- Sliding bar to adjust the width of the design by simulating different types of resolutions.
- Save the edited content and publish the page.
- Save only edited content without publishing.
- Actions:
- Creating an experiment, this will create a new version of the landing in which
we can alter some components and perform Tests A/B. Attention: This function is only in the Datacrush Black version. - Preview the page you are editing.
- Save a draft and exit edit mode, returning to the list of landing pages.
- Viewing the landing page simulating the entry of a specified contact, it will behave depending on the content rules entered.
- Creating an experiment, this will create a new version of the landing in which
- Viewing the landing page simulating the entry of a specified contact, it will behave depending on the content rules entered.
- Configuration area of all landing components and elements.
The Configuration Area (7) has three tabs that we will access to configure the Landing Page:
General options: here we will find the general landing configuration data:
- Landing Name: Name of the landing page that will be used to be able to identify it later.
- URL page: It will form the web address by which the Landing will be assessed. By default, Datacrush will assign a domain automatically. It is possible to delegate a subdomain of your Datacrush membership to be used in landing.
- Campaign: Campaign to which the landing page belongs, used to group statistics.
- Day and time of publication of the page: The page can be published immediately or scheduled for a particular date and time.
- Page Expiration: Determines whether the page is no longer visible on a given date and time, then you must enter which landing page or external URL visitors entering the expired landing are redirected to.
Content:Templates have different editable content areas defined, which are selectable for editing by clicking on which you want to modify, this action will cause DataCrush to display in the Configuration Area (7) the design module for that slice.
In addition to the editable content areas, you'll find in this tab:
- Page Title: Title of the Landing that will be accessed by search engines for indexing.
- File Download: A file can be uploaded so that the visitor can download it by entering the Landing. This file will be downloaded automatically when entering the landing, so usually this feature is used in a second Landing after filling out a form.
- Editable content: Depending on the type of content you want to edit, different types of information are requested. You can also create dynamic content based on lists or lifecycle.
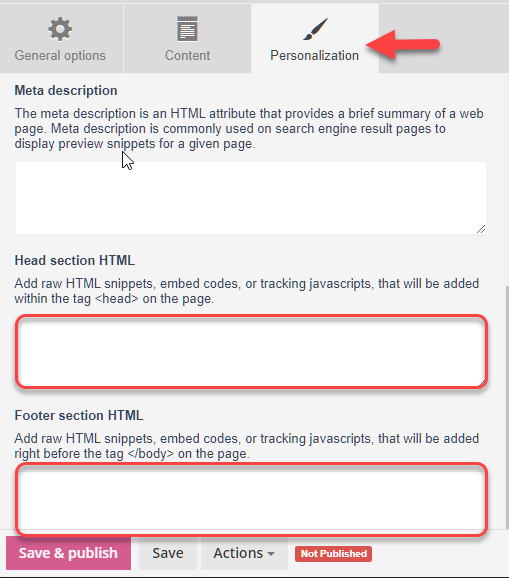
Customization– This section allows you to configure design and HTML aspects:
- Select the template colour: In the event that the selected template has different types of colours, they can be selected to change the style of the template.
- Custom CSS: Make style adjustments to adapt the template to the features of the created landing page. Ideally it is recommended that this configuration be made by a designer or programmer as an incorrect configuration can break the landing design.
- Meta description: They are HTML attributes that provide concise explanations of the contents of web pages. Metas are commonly used on engine search result pages to display preview snippets for a given page.
- HTML header section: Add HTML snippets, embedded code, or tracking JavaScript, which will be added within the <head> tag on the page.
- HTML Footer section: Add HTML snippets, embedded code, or tracking JavaScript, which will be added to the right before the </body> tag on the page.
Safe Navigation.
When designing a Landing Page, you can select the option to force it to display under secure navigation or using the SSL protocol.

This gives us the possibility that these are not accessible by robots to place it in search engines.
Creating the subdomain for landing pages.
When a portal is created on the platform, a DataCrush-specific domain will be used by default to access published landing pages.
For example: tuportal.dc.mk or tuportal.datacrush.la
DataCrush allows portals to use their own subdomain to access published Landing pages, for example: landing.tuportal.com
In order to use this important functionality, the steps are:
Within the landing editor, on the Options tab, under the function to create the page URL, click the Configure My Domain button.

From there, if you follow the steps in this guide, you can configure the subdomain seamlessly, because from there a circuit is activated that generates everything from behind.
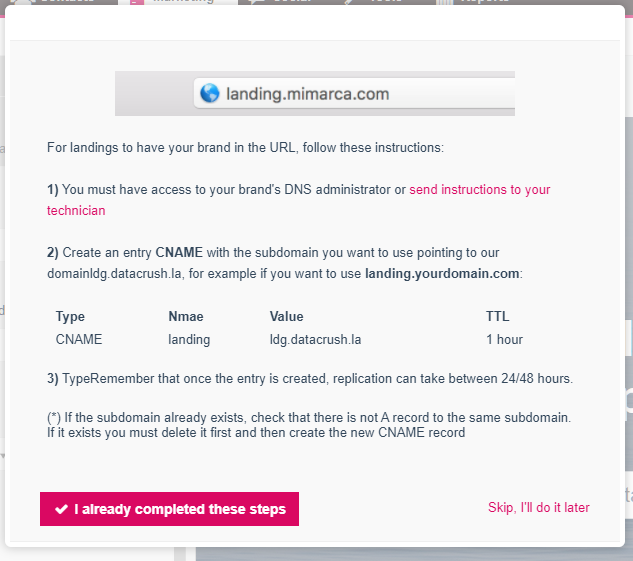
Even if in the future, they have to send this guide to the technical area of the company, which deals with domain management, from the button in step 1 (send instructions to your technician) they can send an email with the same steps.

In the event that the subdomain you want to use is already in DNS, verify that there is NO type A record already configured for the same subdomain, if it exists you must first delete it, and then configure the new record of type CNAME.
Text editor features.
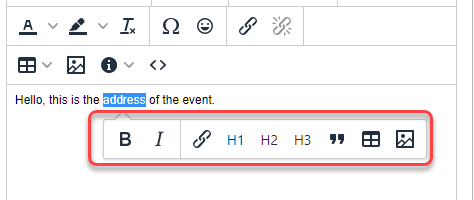
The text editor that is activated when you select, for example, a text block module, also allows us, among other functions, to be able to independently edit a paragraph or line so that among other things you can customize a colour and not just select a fixed one.

Comments
0 comments
Please sign in to leave a comment.